Large Geared Cube, Motorized Edition


Large Geared Cube, Motorized Edition
Published 2017-03-27T18:37:17+00:00
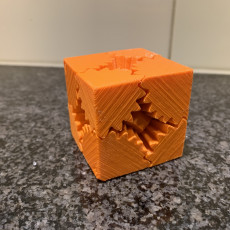
"Large Geared Cube, Motorized Edition" is a larger (2X) version of my "Geared Cube, Motorized Edition", which was based on emmett's "Three Cube Gears" (http://www.thingiverse.com/thing:213946). Standing approximately 240mm (9.5") tall and 170mm (6.75") wide, this larger format version was requested by friends and associates as it is much easier to see at a distance during school presentations, exhibitions, etc., as well as in the home. Check out the video for the size comparison with the original version.
Video of high speed break in of this thing is here: https://www.youtube.com/watch?v=23ByThsWH2w.
The left cube is the original version, and the right is the 2X version. The green mat upon which both versions rest is 1" resolution.
This thing requires both a lot of filament and a lot of time to print, but the end result is worth it for presentations.
Designed Sketchup Make 2015. Printed in PLA on an Ultimaker 2 Extended using Cura default settings.


.4mm Nozzle.
Print "Gear Motor.stl" at 100% infill.
Parts I Purchased:
1) Motor: http://www.amazon.com/gp/product/B009N81HES?psc=1&redirect=true&ref_=oh_aui_detailpage_o03_s00.
2) Coaxial Power Jack: Radio Shack part number 274-1583.
3) 3.0 Vdc Power Supply: Radio Shack part number 273-315 with the "N" style plug 273-345, you get one free with the power supply.
Tools and supplies I used:
1) Rubber mallet.
2) Small vise.
3) Flat punch set.
4) Modeling knife.
5) Small files.
6) Sandpaper.
7) Slip joint pliers.
8) Needle nose pliers.
9) Thick cyanoacrylate glue.
10) Cyanoacrylate accelerator.
Instructions:
Print all pieces as shown in "Assembly.skp" or "Assembly.stl". You will need to print:
1) One of "Base.stl".
2) One of "Cube Gear Base.stl".
3) One of "Hub.stl".
4) One of "Gear Hub.stl".
5) One of "Gear Motor.stl".
6) Three of "Cube Gear Large.stl".
7) Four of "Cube Gear Small.stl".
8) Seven of "Pin.stl"
I printed the prototype in blue and black. While I broke down the assembly into individual components, by using Cura's editing abilities and the Ultimater 2 Extended's ability to print to the extents of the build plate, I was able to print this thing in three print sessions by combining the individual parts for three build sessions; two for the blue parts, and one for the black parts. If your printer does not print well at the extents of your build plate, I recommend you print the components one at a time. In either event, this is a long, yet easy print. Patience comes to mind.
As a test for your printer, it's settings and the colors you use, I recommend starting, as did I, by printing one "Cube Gear Small.stl" and one "Pin.stl". After printing, insert "Pin.stl" into "Cube Gear Small.stl" and make sure it spins freely with little or no effort. If it does not, using your slicer, slightly decrease the size of "Pin.stl" (e.g. by .98) and print then try it again. If it is too loose, slightly increase the size of "Pin.stl" (e.g. by 1.02) and print then try it again. If you cannot easily scale the pins, let me know and I will upload the scaled pins for you.
Assemble as per Assembly.skp (or Assembly.stl).
Hope you enjoy it, and thanks to those whom requested this large format, it was an enjoyable design and print.
| Date published | 27/03/2017 |
| Tecnologia | FDM |
